Ingenic USB Cloner Tool and Guide
This page mirrors the legacy Thingino USB Cloner guide so the downloads, screenshots, and walkthrough remain available directly in the catalog site.
The Thingino project provides a browser-based flashing utility as an alternative to closed-source cloner applications. The tool performs the same flashing operations through a standard web interface without requiring any additional software installation.
The web flasher depends on the Web Serial API, which is currently available in Chromium-based browsers such as Chrome, Edge, and Chromium.
Downloads
Application Setting
Download the cloner bundle for your operating system using the links above, extract it to a working directory, then open the cloner directory.
Make sure you have a folder named 0_Firmware_Root inside the cloner directory before opening the cloner application.
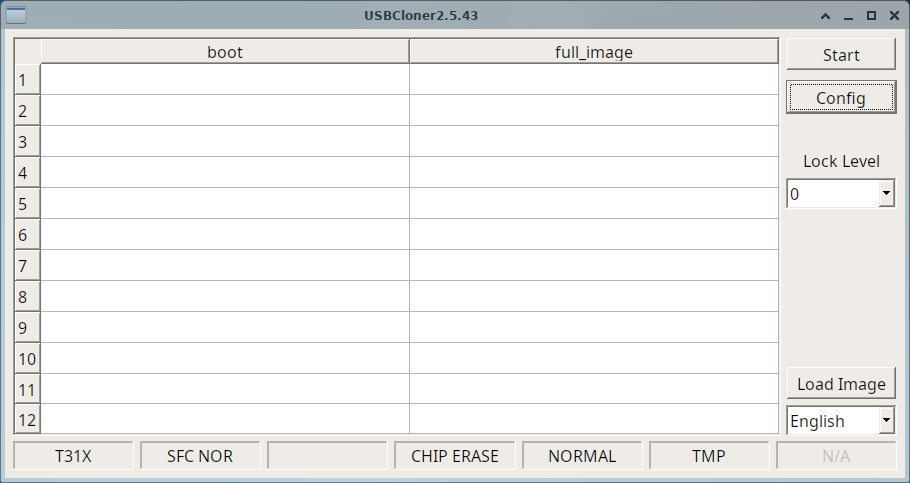
Click the Config button in the top-right corner. Under the INFO tab, select platform T and choose the correct SoC variant for your device.
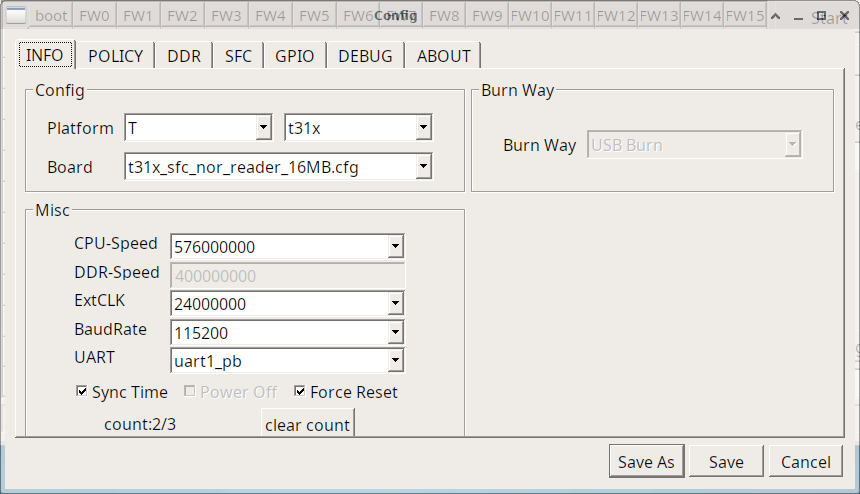
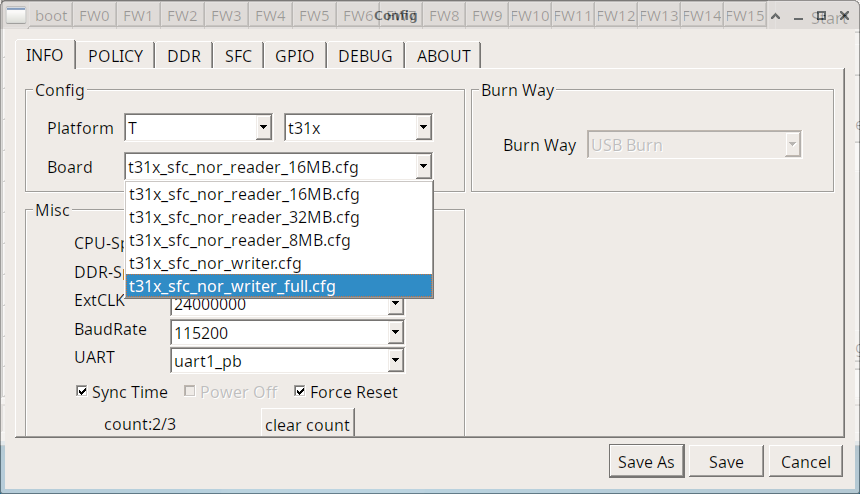
In the Board dropdown, select the appropriate sfc_nor_writer_full.cfg profile for the chosen SoC.
On the POLICY tab, use the ... button in the setting column to select the firmware image you want to write.
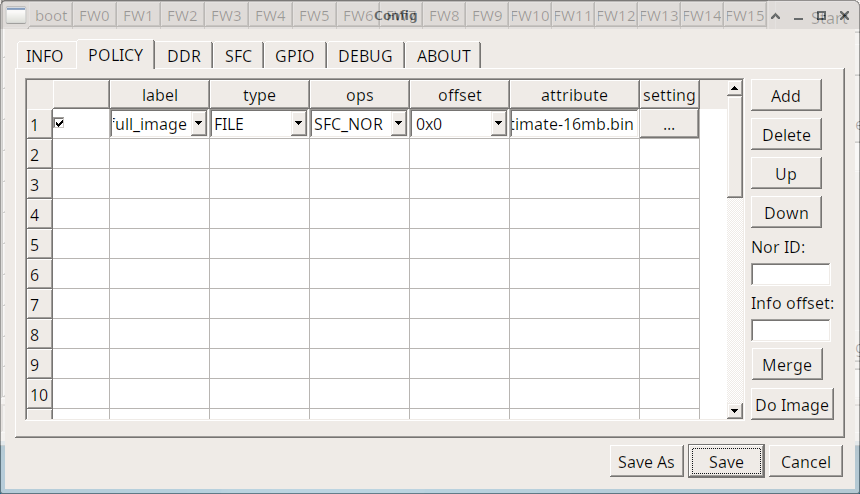
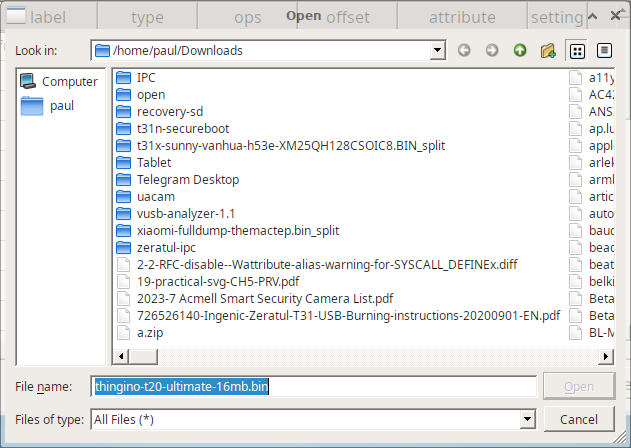
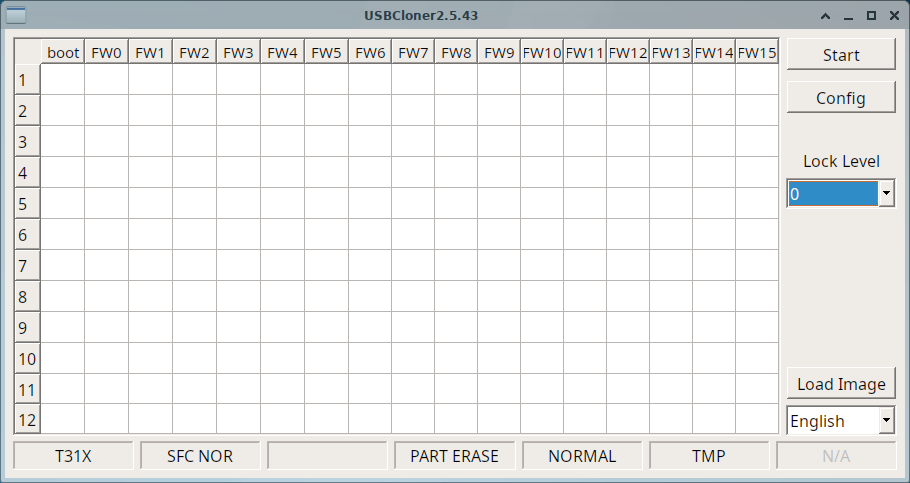
Click Save to return to the main screen, then click Start.
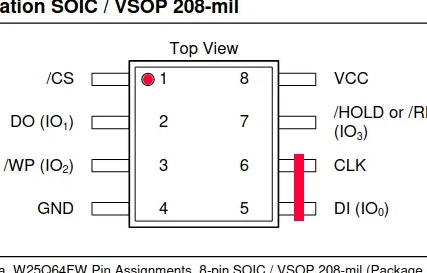
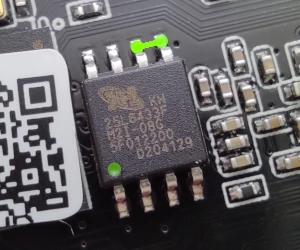
Plug the USB cable into the device, leaving the other end unplugged. Short pins 5 and 6 on the flash chip, not on the SoC or another chip, using the reference images below.
While maintaining the short, connect the USB cable to the computer. Wait a couple of seconds, then release the short. It can take up to 30 seconds for Cloner to recognize the device.
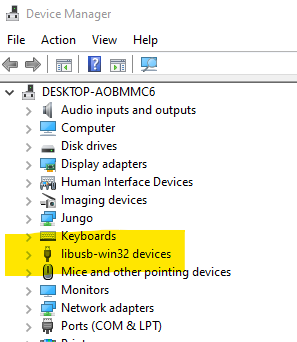
Check Device Manager on Windows or dmesg on Linux for the Ingenic Cloner device.
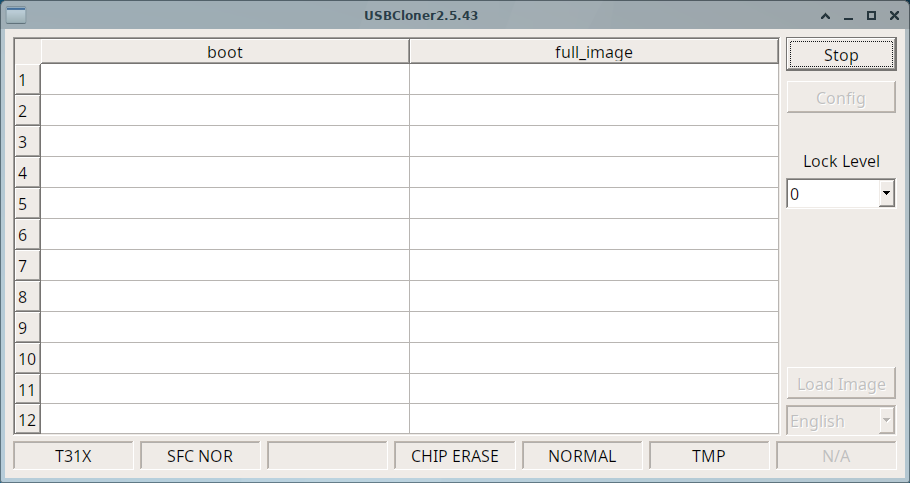
Once all progress bars turn green, the flash operations are complete.
Video
Using Cloner to flash firmware over USB.